Updates:
December 25, 2012 - started
December 27, 2012 - explain more about myself, transferring the cartoon to glass, mixing paint, painting the black trace lines
December 28, 2012 - firing the trace lines
December 29, 2012 - firing the "shading"
December 30, 2012 - results of the firing of shading, setting up the board for caming the rose, tools needed to apply the came
December 31, 2012 - what is came?, what sizes/shapes I am using, starting the came
January 2, 2013 - the caming is done
January 7, 2013 - soldering, cementing
January 8, 2013 - final piece, thoughts on this piece
First off let me give an apology for the set up of this blog. This is the first blog that I have ever tried to write. I am not sure if it works better to show my experiences from start to finish or finish to start - meaning that the oldest entry is at the bottom. I just hope that you will follow along with me as I learn and experiment with the technique of Medieval Stained Painted Glass. So for now I will go from inception to end in this blog and see how it goes.
I have been reading several books on Medieval stained glass and painted glass that a friend has gotten me from their University. I will give the details of the book etc when I first mention anything that I have taken from them. After that I will refer to the the title of the book, the author and pages.
A little about me, I live in the area of Cape Cod Massachusetts, USA and I have a small modern stained and fused glass business. As I did more and more fusing, I started to get interested in getting more detail into my work and started to look into mundane painting with liquid paints and firing. Since I also belong to the SCA - The Society for Creative Anachronism - I decided to get more "period". Therefore I decided that I knew enough to jump right into it! I ran out and bought all different colors of powdered paint to paint on "clear" glass and I was on my way. WRONG! To find out what I have found out read below and ENJOY!
DEFINING STAINED/PAINTED GLASS:
I have started my medieval red rose project. This will be my first experiment with colored glass and paint. All of the books have mentioned the fact that there is a misconception about "painted" stained glass from the Medieval period. Medieval painted glass is colored glass that is painted with black tracing lines or a brown shading. Not clear glass that is painted colors. There are two exceptions to this that I see - one is called "silver coating" and one is the use of color to either enhance a bad piece of glass or to change the shade of it. I will not be using either of these exceptions on my first piece - the red rose. From what I have seen in my research silver staining dates from about the 17th century.
The Artistic Crafts Series of Technical Handbooks - Stained Glass Work -- Edited by W. R. Lethaby - The Ballantyne Press England 1920 reprint. Defines stained glass as "pieces of coloured glasses put together with strips of lead into the form of windows; not a picture painted on glass with coloured paints....Such coloured glasses are cut into the shapes of faces, or figures, or robes, or canopies or whatever you want and whatever the subject demands; then features are painted on the faces, folds on the robes, and so forth - not with colour, merely with brown shading; then when this shading has been burnt into the glass in a kiln, the pieces are put together into a picture by means of grooved strips of lead into which they fit" [pages 29, 30]
PICKING THE GLASS
Stained Glass of the Middle Ages in England and France by Lawrence B Saint;Hugh Arnold A & C Black Limited Great Britain 1925 explains the process of making glass as such -- "It is sand melted and run together. The best sand for the purpose is that which is most largely composed of the substance called silica, such as sand formed of powdered quartz or flint. For some reason, the silica when melted does not recrystallize on the cooling as might have been expected, but forms an even transparent substance, plastic while still hot...Given sufficient heat glass can be made by this means alone, but the heat required is so great that it has only been done in recent years for special purposes by means of the electric furnace. Failing this, the sand must be induced to melt at a lower temperature by means of a flux, for which either potash or soda may be used, and to which lime or lead must be added, to enable the glass to resist moisture....Glass may be coloured or stained while in a molten condition by the admixture of various substances, mostly metals, gold, copper, manganese, and so on, the result depending on the temperature to which it is subjected and on the exact composition of the glass as well as the colouring matter used" [pages 13, 14]

 Obviously I
can not replicate this process, so I have picked for my
project red [for the rose] and green [for the leaves and stem]
cathedral glass made by Spectrum. Modern day
cathedral glass is a very smooth, translucent glass with minor if any
bubbles. Stained and Decorative Glass Elizabeth Morris Chartwell Books, 1993 states " Certainly by the 5th century AD, the Romans had found that a little copper dispersed in the melt produced a ruby coloured glass, medieval glassmakers later discovered that the addition of manganese produced a rose pink colour and in the 17th century the addition of gold chloride was found to produce a beautiful , rich ruby colour."[page 10].The green coloring can
be made by adding either iron or chromium or both. I have not determined the background glass that I will use at this time. See below for the samples
of the glass that I will be using.
Obviously I
can not replicate this process, so I have picked for my
project red [for the rose] and green [for the leaves and stem]
cathedral glass made by Spectrum. Modern day
cathedral glass is a very smooth, translucent glass with minor if any
bubbles. Stained and Decorative Glass Elizabeth Morris Chartwell Books, 1993 states " Certainly by the 5th century AD, the Romans had found that a little copper dispersed in the melt produced a ruby coloured glass, medieval glassmakers later discovered that the addition of manganese produced a rose pink colour and in the 17th century the addition of gold chloride was found to produce a beautiful , rich ruby colour."[page 10].The green coloring can
be made by adding either iron or chromium or both. I have not determined the background glass that I will use at this time. See below for the samples
of the glass that I will be using. How to get "flat" glass -- "Glass is made into vessels, as most people know by 'blowing'. The workman takes a dab of molten glass on the end of a long metal pipe, and putting his mouth to the pipe blows the glass - soap bubble fashion into a hollow bulb. Then by a rapid and dexterous series of alternate and repeated heating, blowing and spinning and manipulation with tools, most fascinating to watch, he shapes it into the form required. If a flat sheet be required for window glass it may be run out flat when liquid or blown as described above and worked into cylindrical form, split open, and unrolled. This is called 'muff glass'."[Stained Glass of the Middles Ages - Saint/Arnold pp 14-15]
DESIGNING A PATTERN
I did a design that could incorporate both pieces of colored glass and painting of that glass. See below for the design - this is called a "cartoon" in modern times.

After looking at this design again I have decided that I don't like the last two leaves on the stem and will eliminate them. Upon looking at the rose part of the design I have broken down the segments based on the ease of cutting the glass and installing the leaded came between the glass. See below for the cuts that I will be doing on the head of the rose.

TRANSFERING THE CARTOON TO THE GLASS
In Medieval times Divers Arts Hawthorne/Smith describes this step as folows - "first make yourself a flat wooden board, wide and long enough so that you can work two sections of of each window on it. Then take a piece of chalk, scrape it with a knife all over the board, sprinkle water on it everywhere and rub it all over with a cloth.When it has dried, take the measurements, mainly the length and breadth of one section of window, and draw it on the board with a rule and compasses with a point made of tin or lead....after this take a lead pot and put in chalk ground with water. Make yourself two or three brushes out of the hair of the tail of marten, badger, squirrel, or cat or from the mane of a donkey. Now take a piece of glass of whatever kind you have chosen but large on all sides than the place in which it is to be set, and lay it on the ground for that place. Then you will see the drawing on the board through the intervening glass, and following it, only on the glass with chalk" [pages 62-3]. Basically they drew out their "cartoon" on a board with chalk and then traced it though the glass that was placed on top of this "cartoon".
I currently don't have any chalk to try this out with but will buy some and experiment with it. I also have realized that my glass is very dark. I picked it because of the vibrancy, however I now can see that it is difficult to see through to mimic the technique above. In my modern work, I cut out the cartoon and glue it to the glass when it is too dark to see through which is what I will do for this piece. Diverse Arts Hawthorne/Smith describes how they would have handled dark glass - " If the glass is so opaque that you can not see the drawing on the board through it, take a piece of the [clear]white glass and draw on that. As soon as the chalk is dry lay the opaque glass over the white glass and hold them up to the light; then draw [on the opaque glass] in accordance with the lines that you see through it." [page 62}
Therefore what I will do for this project is put the cartoon [as if it is the "white" glass] and trace around it. I will be using a very modern grey sharpie.....


CUTTING PIECES OF GLASS
I decided to try the technique which was most likely used in the medieval time period - "when cold, the sheet or disc of glass may be cut to the shape required, either as in the old days, by running a hot iron slowly along the proposed line of fracture, in which case a crack will follow the iron" [Stained Glass Saint/Arnold - p 15.]
The only hot iron that I have is my soldering iron so I set it to normal soldering temperature about 650F.

I ran the soldering iron along the grey line that I had drawn and got no response from the glass. I than increased the temperature to as high as it can go 1000F and repeated this step. No response from the glass. I then used a nail to create a slight line on the glass and reheated but this also did nothing.
The description of this technique from Theophilus On Divers Arts John G Hawthorne and Cyril Stanley Smith Dover 1979 is " next heat on the fireplace an iron cutting tool, which should be thin everywhere except at the end, where is should be thick. When the thicker part is red hot, apply it to the glass you want to cut, and soon there will appear the beginning of a crack. If the glass is hard[and does not crack at once], wet it with Saliva on your finger in the place where you had applied the tool." [pages 62, 63]
My translation of "red hot" based on my experience fusing glass would have to be about 1500F. The surface of the glass must be "pierced" in order for the crack to start. In modern times you can use a steel or diamond wheel which will break the tight surface of the glass allowing it to crack along the line that you have made. The red hot iron would have created the same result because it would have melted the very top layer of glass allowing it to break along the lines.
In the end as I did not have anything hot enough. I resorted to my standard modern wheel cutter, and cut out the leaf as shown below. I might try later to use my gas canister that I do glass beadwork with and heat up an iron tool and see if I can accomplish this using the Medieval technique.


I will continue to use this modern style of cutting until all of the pieces of the rose, stem and leaves are cut out. The black handled tool above is a glass grozer. This is a tool which would have been basically the same since the Medieval times. "When all the pieces have been cut like this, take a grozing iron, a span long and bent back at each end, and trim and fit together all the pieces with it" [On Divers Arts Hawthorne/Smith page 63]. Basically the grozer nibbles at the glass taking small pieces out until it is the correct size. I do wonder if they might have also used a type of file or sander/grinder but I have found no references to this so far.
See below for all the pieces cut out with the pattern showing through on a light box. The lines inside of the pieces are what will be painted as well as shading for shadows etc.
NOTE: I have taken off the two leaves that I did not like.

MIXING THE TRACING BLACK PAINT
The next step will be to prepare the black paint that will be put on the red and green pieces to detail the separate areas of those items. These are called tracing lines. Diverse Arts Hawthorne/Smith have Theophilus describing this process as " Take copper that has been beaten thin and burn it in a small iron pan, until it has all fallen into a powder. Then take pieces of green glass and Byzantine blue glass and grind them separately between two porphyry stones. Mix these three together in such a way that there is one third of [copper ] powder, one third of the green and one third of the blue. Then grind them on the same stone very carefully with wine or urine, put them in an iron pot or lead pot and with the greatest care paint the glass following the lines on the board." [page 63]. The problem that I have with this description is that it has powder and a liquid to mix the powder but it doesn't have a binder. Gum arabic is used as a binder and I have seen references to sugar being used. This item helps the fired paint adhere to the glass. I will continue to do more research into the process that they used and materials for binders. I will be using Reusche Best Tracing black paint powder, gum arabic and water to mix my tracing black paint.

Also I will not be using the 1/3's that Theophilus mentions for the tracing black as it will make it too wet to hold and be a dark line. I will use about 95% paint to 5% gum arabic. The paint needs to be put onto a clear pane of glass and using a pallet knife any lumps need to be broken up - picture one. The gum arabic is sprinkled over the top very lightly - picture two. Both of these items are thoroughly mixed together while in powder form make sure that there are no lumps. Than several drops of water are put next to the edge of the paint and using the pallet knife the water is mixed into the paint in a circular motion - until it is completely mixed. Add water as needed. I have mixed mine to the consistancy of a cake mix - picture 3.
Picture one - black powder paint:

Picture two - black paint with gum arabic sprinkled on it:


There is no documentation so far that I have found that mentions a size of paint brush --- such as modern size 2 or 3. Above I have described in the transferring the cartoon the types of bristles that Theophilus mentions that were used. I decided to use a number three brush. The lower brush in the next picture. The upper brush is a two but the bristles are not as long and I wanted flowing lines.

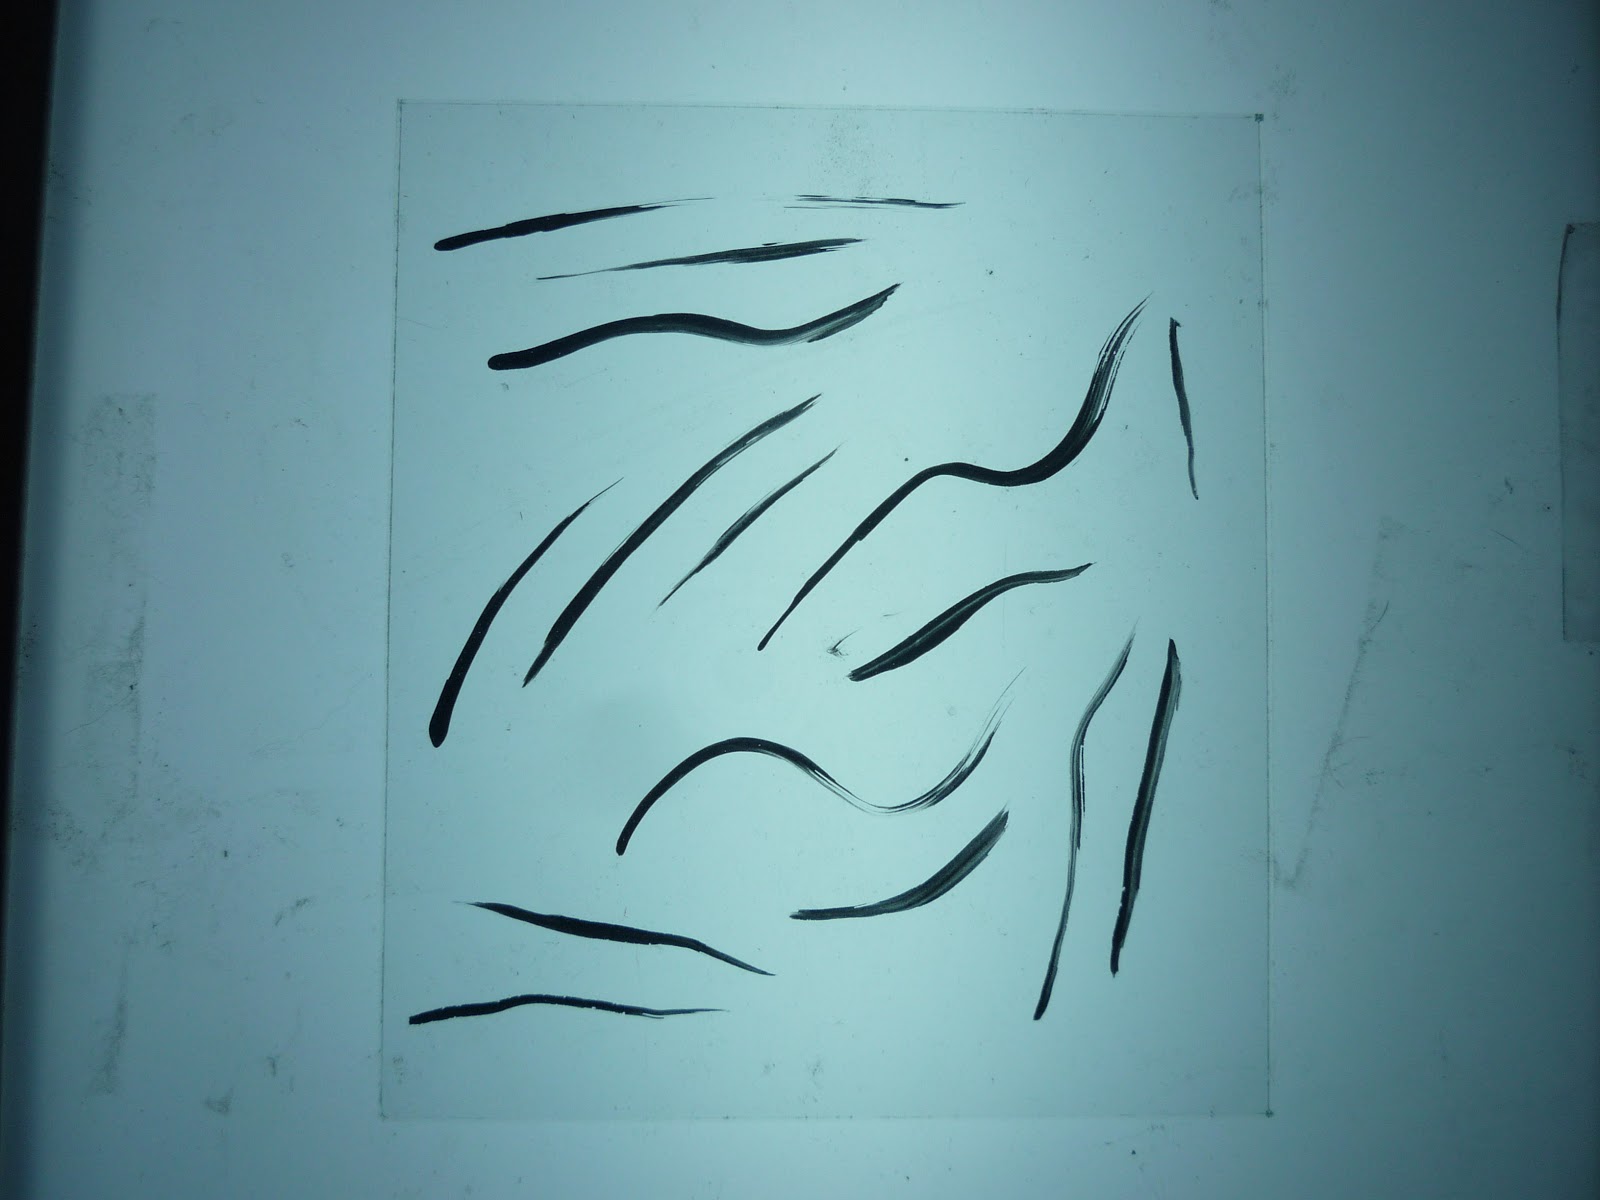
I filled the brush with paint and experimented with a clear piece of glass. Drawing all sorts of lines to get a feel for how the paint came off of the brush. Below is a sample of some of my "playing"
I placed the red and green pieces of glass over the cartoon, because the glass was so dark I had to use a light box to see through them and I painted the main lines on them. When the black tracing paint dries it is grey. The picture below shows the result and you can see that some of lines are not even and need to be cleaned up

CLEANING UP THE TRACING LINES
I have seen references that in medieval times they used sharpened bamboo pieces to scrap away excess paint after it has dried and before firing. I have decided to use a toothpick to clean up the lines. Below is the cleaned up pieces ready for firing.

FIRING THE TRACE LINES
Theohilus in Diverse Arts gives a very detailed description on how to make your own furnace, including one where you could make your own glass sheets. It is very unlikely that any glazier - the person who puts that glass pieces together or the painter who applies the detailed to the cut glass would have made their own glass. Like myself they would have bought it. I have an EvenHeat tabletop kiln that I use. I also used a special firing paper between the glass and the shelf in the kiln so that the glass will not fuse to the shelf. I could have used a wash also. I have not found any research on what they might have used in Medieval times.

In modern work I fire to 500F and then let the glass set for 10 minutes to soak the "heat". I have not found a detailed description of how this was done so I have used the same technique. This prevents modern glass from cracking by rising too fast in temperature. I shut the kiln off at about 1400F and let the glass set overnight.I have taken them out and they have fired to a slightly glossy black which I can not seem to capture on my camera. Next is the detailing.
DECEMBER 29, 2012
DOING THE SHADING OR DETAILING
In the the book On Divers Arts Hawthorne/Smith - Theophilus has a section titled "three shades of color for highlights on glass" [pg 63] Theophilus states "when you have made the painted areas in robes out of the above mentioned pigment, smear it about with the brush in such a way while the glass is made transparent in the part where you would normally make highlights in a painting, the same area is opaque in one part, light in another and still lighter[ in a third]" and distinguish with such care that there seem to be , as it were, three pigments placed side by side. [page 64]. I have read other sources that dispute this smudging technique but I figured that I would try it.
This part does not seem like it would work too well on the dark glass that I picked....I can tell that I should have used lighter glass in order to do highlights at this point., Now when I look at dark colors in stained/painted glass pieces I am noticing the they have dark lines to distinguish sections but real no "detailing". However since I have come this far...ONWARD!
I have used this "smudging" technique along with "painting" the detailing on. However I used my finger to smudge not a brush. The brush wanted to remove the paint...not smudge it. Below is an example of the leaves done this way. The paint has dried and is ready to go into the kiln. I have done the same on the red pieces but you can't really see it, even on the light box that I am using below.

I will put these in my kiln using the same process that I used to fire the trace lines onto the glass and see how they come out.
December 30, 2012
HOW DID THE SHADING FIRE?
Well this was disappointing, the glass was so dark and the method smudging made the paint very light. I have tried to take a picture of one of the leafs but basically the shading is very slight. Perhaps when put in the came and held up a light, than it will look better.

SETTING UP THE BOARD TO DO THE CAMING
Well if you have read my blog on the Christ head that I am doing, you will find out that my "experiment" with chalking the set up board did not go so well. Therefore I have decided to stay with the modern techniques in setting up the pattern on the board which the piece will be built on. In Medieval times, they would have chalked the board up to outline the shapes of the pieces to cut and they would have used the same board to build the actual piece up on. I am going to use a piece of paper with the cartoon/design taped to the board.

In On Divers Arts Hawthourne - Theophilus - talks of taking" the measurements, namely the lenght and breadth of one section of a window, and draw it on the board with a rule and compassa". This would basically provide the squaring of the design to fit in the window. I have not found references yet to building up an angle on the board and securing it so that you have a secured area that won't move to start building the window. I have shown below my setting up of this square corner. For my modern work I use - steel rails and tacks - as still does not warp. For this project, I have used wood and the came nails. I figure if I find an reference to this process, then I will find out that they probably used these materials.
Below: the steel rails versus the wooden pieces

Installing the wooden guide pieces onto the wood base:


TOOLS NEEDED TO DO CAMING
Caming is the process of using a lead material to outline the glass pieces and then using that lead material it forms the basis of the joint to solder the work together so that it does not fall apart. Tools needed are cutters. There are modern day came knifes which are very similar to linoleum knifes. I use lead cutters so that is what I will use for this project. In future projects I will get a knife to experiment with as that would be more period to the medieval methods.


December 31 2012
WHAT IS CAME?
 Came are pieces of lead that hold the glass pieces together so that they can form a window/picture. "The idea of using a framework of lead to hold together the pieces of glass may well have been inspired by the art of the goldsmith and the cloisonne enameller....The strips of metal used by the cloisonne enameller to enframe areas of coloured enamel are, with their raised outlines, even more suggestive of lead lines in stained glass window....Another important discover was linked with the invention of casting, or milling, a strip of lead with a section that could be shaped and jointed to hold glass in a transportable panel." - Stained Glass. Lee page 12. Theophilus in On Divers Arts - Hawthorne - has a chapter devoted to the casting of the cames. This is not something that I am able to do so I have purchased the formed came. I will be using what is called a H came - this is came that can take a piece of glass on both sides. This is shown as the top piece below. I am using 3/16" H. The U came that I am using can only take glass on one side and is used to outline the piece. This is shown as the second type in the picture below. I am also using 3/16" U came.
APPLYING THE CAME
Theophilus describes the process of putting came around the glass pieces in On Divers Arts Hawthorne by saying - " take the painted and fired glass and lay it in its order on the half of the board where there is no drawing. After this take up the head of a figure, wrap a lead came around it, and replace it carefully[on the drawing on the first side of the board]. Then drive in three nails around it with a hammer suited for this work and fit to it the breast, the arms, and the robes that remains. As you set each piece in position, secure it with nails on the outer side so that it can not move from its place" page 71. This is the same process as done in modern glass work with one big difference. In modern glass work the artisan works from a corner and goes out. They do not tend to work from the center of a design. I have set up my board with the glass pieces and have done the first piece below.


The following picture shows the rose flower part completely camed.

I will continue to came all the pieces. I have picked a blue slightly textured glass for the background.
January 2, 2013
See picture below for the piece with all the came on it. I ended up changing the design because of issues being about the put it together with the size came that I used.

Next I will be soldering the piece.
January 7, 2013
SOLDERING THE ROSE
I finished doing this piece last week but will show the pictures of the progress today.
Below is the rose soldered on the front side. I have also soldered all the joints on the backside. Using 60/40 tin/lead solder.

Than I put a chemical called "black patina" on it in order to make the silverish grey came turn black

After that I used "cement" a mixture of Miracle Mudd and a liquid binder to put a "sealer" under the came. I applied the cement liberally on the piece and then used a cement brush to "brush" it under the came and seal the space.


Once the came had the cement between it and the glass, I put a product called "whiting " on it which helps to set the cement. It is basically a hardener.

Lastly, I cleaned the whiting off.
Tomorrow I will put a picture up of the finished piece, which I am not happy with. And will talk a little about what I learned on this my first piece of medieval stained glass painting!
January 8, 2013

CONCLUSION
I am disappointed in this piece. I tried to do the shading as suggested by Theopilus in Divers Arts. He only mentions the tracing black. He does not mentioned shades of brown. I don't know if this is an oversite or not. My attempt at using just the trace black for shading did not come out well. Perhaps if I had watered down the black to be more of a stain consistancy instead of a pigment consistancy, maybe it would look better. I also think that the colors may have been a bit dark for the shading. I have noticed shading on the Gathering Manna glass that I am now doing, but it has shading on the red but the shading is more to the edges of the darker pieces...not in the middle.
Thanks for reading this!
No comments:
Post a Comment